Introduction
Effective property management isn’t just about maintaining properties, it’s about managing owners’ finances with accuracy, clarity and trust. Property owners expect transparency and timely information about their investments, while property managers need reliable tools to track, report, and process financial data with ease.
GuestWisely’s Owner Management module was designed to meet these needs, offering a seamless system that simplifies financial management, strengthens owner relationships and increases operational efficiency.
At the heart of GuestWisely’s Owner Management module are three essential tools working in sync:
Trust Accounting provides real-time, owner-level tracking of funds owed and due, ensuring financial accuracy, control, and proper allocation of every transaction between property managers and owners. It serves as the financial foundation, keeping your records balanced and transparent. Learn more here.
Owner Statements deliver clear, professional monthly financial summaries for each property or owner. These reports give owners a reliable, high-level snapshot of their property’s financial performance and build trust through consistent, transparent reporting. Details covered shortly. Learn more here.
Owner Remittance Dashboard takes over when it’s time to make payments, offering a real-time, actionable overview of amounts owed or receivable. It acts as your payments to-do list, seamlessly integrating with external accounting tools like QuickBooks or Xero to ensure payments are processed accurately and on time. Learn more here.
Trust Accounting vs. Owner Statements vs. Integrated Accounting (Owner Remittance Dashboard)

Beyond financial tracking, GuestWisely enhances owner communication and management with:
Owner Login portals for 24/7 access to financial reports, payment statuses, and property data.
Owner Contracts for drafting, signing, and managing agreements in one place.
Owner Invoices to automate invoice generation and reduce manual work.
Commissions Settings to accommodate varied owner agreements and management fee structures.
Together, these tools empower property managers to deliver a higher level of service, maintain financial accuracy and nurture long-term, trusting relationships with owners, all while simplifying the operational workload.
Let’s dive in!
Owner Statement
Owner Statements Overview
The Owner Statement is essentially a monthly report that provides a snapshot of the previous month’s activities. It includes:

All the revenue generated on behalf of the owner.
Any applicable commissions and taxes
The total amount owed to the owner.
Any expenses incurred on behalf of the owner (with applicable taxes)

To access Owner Statements, go to Solutions > Owner Management > Owner Statements. Use the Owner, Property and Month filters to customize the displayed data as needed.

It also breaks down into different sections such as:
Booking records: This section will display the booking ID, booking details, financial information and the amounts owed to the owner for each booking.
Property Management Services: Any expenses marked as Owner Expense will be displayed in this section.
Owner Credit: Owner credits are added through the Expense Manager displayed in this section. Learn more here.
Funds on Account: This section shows the current financial balance including funds held, retainer requirements and amounts payable to the owner.
Owner Statement Setup
Before generating an Owner Statement, ensure the following sections are fully and accurately set up to avoid issues with tax, financial reporting or payouts:
Property owner information.
Services to be included in the owner’s payout.
Commission calculations.
Tax details.
Property Owner information
Property owner information is required to auto-populate the Owner Statement.
To add or update this info:
Go to Portfolio > Property Settings > Property Profile, scroll to Additional Information, and select Owner Details. Here, you can:
Specify if you're the Owner or Manager
Enter details for one or multiple owners (Owner 1–3)
Important: The system uses Primary Owner (Owner 1) for the Owner Statement, Owner Invoice and other similar documents. Owner 2 and 3 serve as references for your staff and also receive any automated messages along with the primary owner.
Owner Statement Auto-lock feature
The auto-lock feature for Owner Statement is designed to help ensure accurate and reliable accounting-a best practice for maintaining the integrity of your financial records. Once remittances have been processed, this feature prevents any changes to past statements, safeguarding your data.

Adjustments after the statement has been locked are done using the Expense Manager. Updates or reconciliations made through the Expense Manager will be reflected in the owner’s current statement period, keeping your records accurate and up to date. Learn more here.
Customizing the Owner Statement
The Owner Statement can be tailored to display specific financial and operational data. Click the Settings button (top right) to include the following sections:

Rent: By default, rent from each reservation is shown, but you can hide it to create a simplified statement without revenue breakdowns.
Services: Use the toggle to display or hide services on the Owner Statement. You can choose to show a total of all services or select specific ones to include in the payout.
Commissions: This section reflects the commission structure defined under Commissions Settings, directly impacting the owner’s payout. Learn more here.
Taxes: Choose how taxes are handled using three options:
You pay: Taxes will be excluded in the owner's payout (handled by you).
Owner pays: Taxes will be included in the owner's payout (handled by owner).
Split: In rare cases, taxes can be shared between both parties.
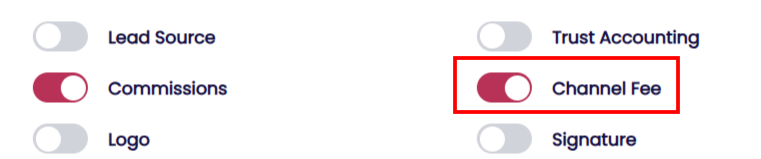
Channel Fee: This is the channel commission paid to sales channels (e.g., Airbnb) to a confirmed reservation. Use the toggle to include or exclude it from the owner's payout. See how Commission Setting affects Channel Fee display here.
Additional customizations: Beyond the above elements, the Owner Statement allows you to show or hide additional details, such as guest name, lead source, number of occupants, logo, signature and Trust Accounting.
⚠️ Impact: Changing these settings affect all unlocked Owner Statements. Lock issued statements first to avoid discrepancies.
Owner Statement Unique ID
To support features like Owner Statement Lock, QuickBooks/Xero integrations and the updated Payout Dashboard, each monthly statement has a unique ID per owner, using this format for easier tracking:
|  |
Sending Owner Statement
At month-end, once everything is verified, open the Owner Statement and click the Email icon in the top right. This opens an email template with attachment options:
Owner Statement (Excel)
Owner Invoice (PDF) – Learn more here.
Trust Accounting (Excel) - Learn more here.

The owner details are pulled from the Primary Owner.
Click each attachment to download and preview.
Check the box next to each file you want to include.
Click Send to email the selected documents to the owner in one step.
The template and attachment settings can be customized under System Email Template > Owner Statement Notification, where you can also automate monthly emails to save time and ensure timely delivery.

Commission Settings
To show commission details on the Owner Statement, enable the Commissions option in Owner Statements > Settings.
The Commissions section in the Owner Statement reflects the setup under Portfolio > Property Settings > Commissions.
Each property has its own commission settings, essential for processing payments and generating accurate statements.

No commission applies
Select this option if you or your company owns the property. It’s also suitable for subletting setups where rent to the owner is recorded as a recurring monthly expense.
Percentage-based commission

About 95% of users use percentage-based commissions, calculated on rent and optionally on services and taxes.
Enable “The following tax applies to the commission” to include tax (e.g., VAT, GST, IVA) on your commission and deduct it from the owner’s payout, ideal when tax is required and you don’t want it to reduce your earnings.
You also have an option to apply commission to cancelled bookings.
Most properties use a single commission rate, but additional rates can be added via the “Add New +” button on the right.
Commission Set up vs Channel Fee Display
This section explains how rent, channel fee and commission are calculated and displayed in the Owner Statement to avoid confusion and ensure accurate payouts.
Net Rent vs Gross Rent – Commission Basis
Under the Commissions Settings, for channel bookings, you can choose to calculate commission on:
Gross Rent: Rental Amount before channel fee is deducted.
Net Rent: Rental Amount after channel fee is deducted.

Note: For cross-checking purposes, please note that the Rental Amount in the booking details (Booking Editor) always shows as Gross Rent.

Channel Fee Display in Owner Statement
Here’s a breakdown of how the commission setting affects the display in Owner Statements:

- By default (if the box is not enabled), the Channel Fee column will not be displayed in the Owner Statement.

- Once enabled, the Channel Fee column will appear. You can then go to Owner Statement settings to show or hide this column in the final report.

- Whether the Channel Fee column is displayed or hidden does not affect the Rent column or the Owner Amount calculation in the Owner Statement.
- There is currently no option to display the Rent column as Net Rent in the Owner Statement when that commission setting is configured.
Impact & Best Practice
⚠️ Changing the commission basis (Net vs Gross) will affect all past transactions and may alter issued payouts in Owner Statements.
⚠️ To prevent discrepancies, lock all issued statements before making changes.
Click here to view the Lock Feature tutorial.
Cost-plus commission (Mark-up)

Owner Contract
Owner Contract Overview
The Owner Contracts module is your all-in-one solution for creating, managing, and organizing property management agreements directly within your system. Found under Solutions > Owner Management > Owner Contracts, it streamlines the entire contract workflow, from drafting to archiving, saving time and reducing manual effort.
With customizable templates, a flexible editor, multi-language and currency support, and smart filtering tools, this feature makes contracts easy to tailor, track and manage. A clear table layout highlights key details like payment terms and expiration dates, while built-in tools simplify updates, renewals, and uploads. Whether local or international, Owner Contracts keeps your agreements structured, searchable and fully integrated into daily operations.
To create an Owner Contract from scratch, follow these steps:

Create Templates – Create and customize reusable contract templates.
Saved Templates – Select a template to begin drafting a new contract.
Draft Contracts – Review and finalize the contract details.
Contracts – Manage, track and update completed contracts.
Create Templates
Before creating an Owner Contract Template, ensure that the Owner Details are completed in the Property Profile.
Under Create Template, use the predefined, editable sections to build your template. Follow these steps:
Enter Template Name in the top-left box.

Go to all sections. Adjust as needed using the Contract Tools key and Language & Currency option (at top left). Additional sections can be inserted by using the “Add Section” button.

Click Create Template at the bottom of the page.

The template created here can be accessed in the Saved Templates tab.
Saved Templates
The Saved Templates section allows property managers to easily access and customize saved contract templates via the top-left dropdown. Templates are ideal for managing contracts in multiple languages, rental types and owner agreements.


Draft Contracts
The Draft Contracts section stores all saved contract drafts, accessible via the dropdown at the top left. Edit drafts anytime as needed.
Ensure all mandatory fields are completed. Click Create contract at the bottom of the page to finalize.
The contract will then move to the Contracts tab and appear in a structured table for tracking and management.
Contracts
The Contracts section enhances efficiency with advanced search and filtering for quick access. A well-structured table layout displays key details for easy tracking, while seamless amendments, renewals and integrations ensure accuracy. Signed contracts can be uploaded and property profile linked, reducing admin workload.
Filtering and Search

Quickly locate contracts using filters by owner, date or keyword.
Owner Name: Select from the dropdown to view contracts for a specific owner.
Date Range: Use calendar icons to filter by start or end dates.
Keyword: Enter contract number, owner name in the search bar to find matches.
Action Buttons

Contract List Table Overview

Displays filtered contracts in a structured layout. Columns include:
Select Checkbox: Select one or multiple contracts for bulk actions.
Contract No.: Displays the unique contract number.
Owner Details: Owner's name and contact information
Remittance Information: Display Remittance info or allows you to add them if not entered during draft creation.
Notes: Enables you to add and view important contract notes.
Start Date: Contract’s start date.
Expiry Date: Contract’s expiration date.
Contract: Download the original document and display create date.
Signed Contract: Upload signed version.
Amend or Renew: Click the gear icon to amend or renew the contract. This redirects you to Draft Contracts.
Integration Status:
Archives
The Archives section allows you to view and restore removed contracts. Click the Restore icon, select Yes in the popup to reinstate the contract under the Contracts tab.

Owner Login
Owner Login Overview
The Owner Login feature empowers property managers to offer property owners secure, controlled access to essential property data and reports. It enhances transparency and streamlines communication by letting owners view only the information you permit. With consolidated multi-owner login and intelligent property-to-owner linking, owners can now access unified statements, bookings and financial data for their entire portfolio, all from a single, user-friendly interface.
Owner Login vs. Owner Details: Key Differences
Owner Login (Located under Owner Management > Owner Login)
Grants owners system access to view calendars, block dates, record bookings and access financial data.Owner Details (Located under Property Profiles > Owner Details)
Stores owner contact and profile info. Does not grant system access. Used for auto-populating Owner Statements and automatically sending booking confirmations and financial summaries based on your configured settings.
Consolidated multi-owner login
Create New login
1. Select “Create new login”.
2. Complete Owner Profile
Enter the owner’s full name, preferred system language, desired username and email address (their login credentials will be sent here).
Upload a custom logo or keep your default uploaded under Brand Integration.
3. Assign properties:

Automatically assign properties:
Select the corresponding owner profile from the list (pulled from the Owner Details section in Property Profiles). This maps the Owner Details to their login, giving them access to view all assigned properties.

Benefits of automatic assignment:
Owners can access a consolidated statement for all properties without switching between them. Ideal for multi-property owners.
Locked financial data remains visible in owner statements, even if a property is deleted or reassigned, ensuring reliable historical records.
Manually assign properties:
Use the search bar and checkboxes to select individual properties.
Other select options: All Properties, Ungrouped Properties, Property Groups (Manage Groups here).
Selected properties will display in the Assigned Properties panel for the owner’s access.

4. Configure permissions
Control what the owner can view and manage, including calendar, reports, accounting tools and other settings.
5. Click “Save” to confirm everything and trigger the email with their login credentials.

Note: Create multiple logins per property if needed (e.g. for family members, accountants). Set customized permissions for each login based on their role.
Select an existing login
Select the owner from the dropdown to:
Edit their login details and permissions
Preview their portal view
Resend their login credentials

You can preview the owner login view to verify the access if needed.
Owner Login View
*This new feature will be available from 22 June 2026
When an owner logs in, they will see a view similar to the one shown below. The main page may vary slightly depending on the permissions granted to their account.
The menu is displayed on the left-hand side of the screen.

HOMEPAGE
The Homepage provides owners with a quick overview of their property's performance, including booking activity, revenue, occupancy metrics, calendar information, reviews, statements, and recent portal activity.
Click on each section to view more detailed information.

Overview
Future Bookings: Total bookings included in Owner Statements from the selected month onward (up to 10 years ahead).
Future Payout: Total Owner Payout amount included in Owner Statements from the selected month onward (up to 10 years ahead).

Month Mode: Displays data for the selected month, with the same month last year shown for reference.
Example: If April 2026 is selected, the metrics will display data for April 2026 and April 2025.
Year to Month Mode: Displays data from January 1 of the selected year through the end of the selected month, with the same period last year shown for reference.
Example: If April 2026 is selected, the metrics will display year-to-date data from January 2026 through April 2026 and January 2025 through April 2025.

Occupancy Rate: Measures the percentage of available nights occupied by confirmed bookings.
Occupancy Rate = (Confirmed Booking Nights) ÷ (Days in Month − Blocked Dates − Owner Booking Dates) × 100

Total Nights Rented: Displays the total confirmed booking nights.
Rent: Displays the Total Rent amount plus any taxes shown under the Rent column in the Owner Statement.
RevPAN (Revenue Per Available Night): Measures the revenue generated per available night.
RevPAN = Rent ÷ (Days in Month − Blocked Dates − Owner Booking Dates)
YTD Rent: Displays the Grand Total of confirmed bookings from January 1 through the end of the selected month and the same period last year. This metric displays the same values in both Month Mode and Year to Month Mode.
Purpose: Helps owners compare year-to-date rental revenue performance against previous years.

Latest Activity: Displays all files downloaded from the Owner Portal.

Calendar
The Calendar section contains three sub-tabs: Calendar, Bookings and Reviews. Each sub-tab provides specific functionality for managing and reviewing bookings.
Calendar tab

Bookings: Total bookings included in Owner Statements of the selected month
Payout: Total Owner Payout amount in Owner Statements of the selected month
From the Calendar View, select a property to:
View property availability and booking status.
View the Owner Payout amount for each booking transaction.
View calendar rates, which already reflect Dynamic Pricing adjustments and Standard Discounts.

Create Owner Bookings and Blocked Dates:
Select the desired dates on the calendar.
Click Book Dates.
Choose either Owner Booking or Blocked Dates.


The owner has the option to use Border and Tinted mode to customize the booking display.

Bookings tab
Select a period to view the number of confirmed bookings, total nights, and total payout, sourced from the Owner Statement. You can also add a new booking.

Latest activity shows confirmed bookings sorted by creation date, with the most recent bookings displayed first.

Reviews tab
Reviews show the average review score and the total number of reviews.
Reviews are displayed from the Review list in your primary account.

Statements
Year-to-Date Payout: Total Owner Payout from Owner Statements from January through the previous month.
Year-to-Date Property Management Services: Total Property Management Services amount from Owner Statements from January through the previous month.

For the Monthly Owner Statement: Rent Amount, Services, Property Management Services and Payout are all shown based on the totals from the Owner Statement.

REPORTS
Owners can view available reports based on their assigned permissions.

ACCOUNTING TOOLS
Owners can view details for: Owner Statements, Analytics Overview and Reviews.
OTHER SETTINGS
Owners can configure calendar sync, online booking and search engine settings.

Was this article helpful?
That’s Great!
Thank you for your feedback
Sorry! We couldn't be helpful
Thank you for your feedback
Feedback sent
We appreciate your effort and will try to fix the article