Introduction
We can start to look more closely into how we edit the page content, concentrating on the grey Module Sections.
Step-by-steps:
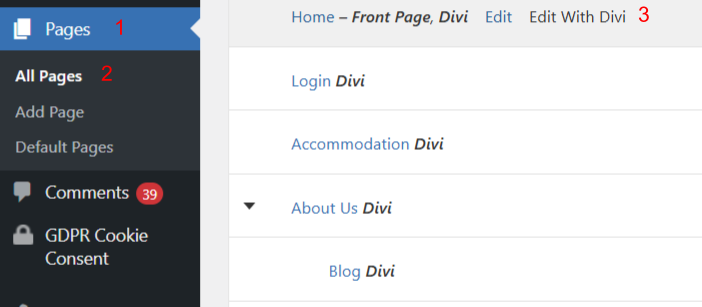
Open your WordPress Dashboard.
Go to Pages → All Pages.
Click the page you want to edit.
Select Edit with the Divi Builder (purple button).
In the builder, focus on the grey Module sections.
Click a module’s gear icon to open its settings and edit the content.
Save the module (green checkmark), then update the page.
Text Module
Each text module is pulling through the fonts we set at a top-level in the WordPress Customiser, which we have set up with suitable sizes for all devices following the steps:
1. Clicking the settings icon will immediately bring up a text editor in the Content tab.
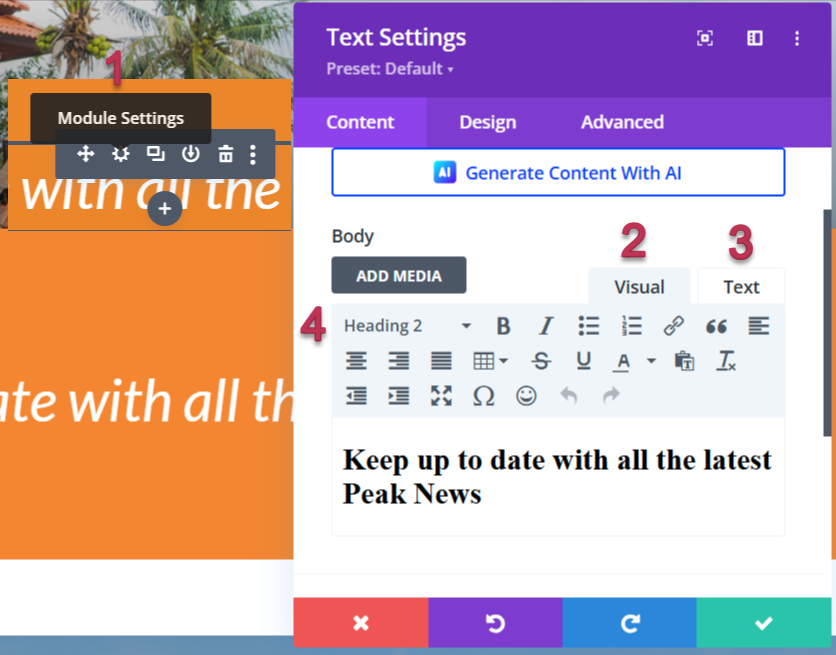
2&3. The editor has 2 sub-tabs Visual and Text. Visual will give you a representation of the final output, previewing size and weight of font. If you highlight some text you will see from the dropdown above it, which class is assigned to it. Paragraph is your body text font and Heading 1 to 6 are your titles with the largest being first.
4. Use the editors toolbar to give any extra styling you require, including adding bullet points and links to your text.
If you are pasting text content into this area from elsewhere eg. another website or word document, you should first copy it into a plain text editor https://www.onlinetexteditor.com/ to strip out any styles that it may be holding.
The Text tab is for more advanced users as it displays the code that is styling the font.
Image Module
There are 2 methods to adding/editing images on your website. You can use the Image module to select a photo from your media library or by using a background image on a column.
1. Select the settings icon of the green section to containing your image.
2. In the section settings, open the column structure and select the settings icon for the column with the image.
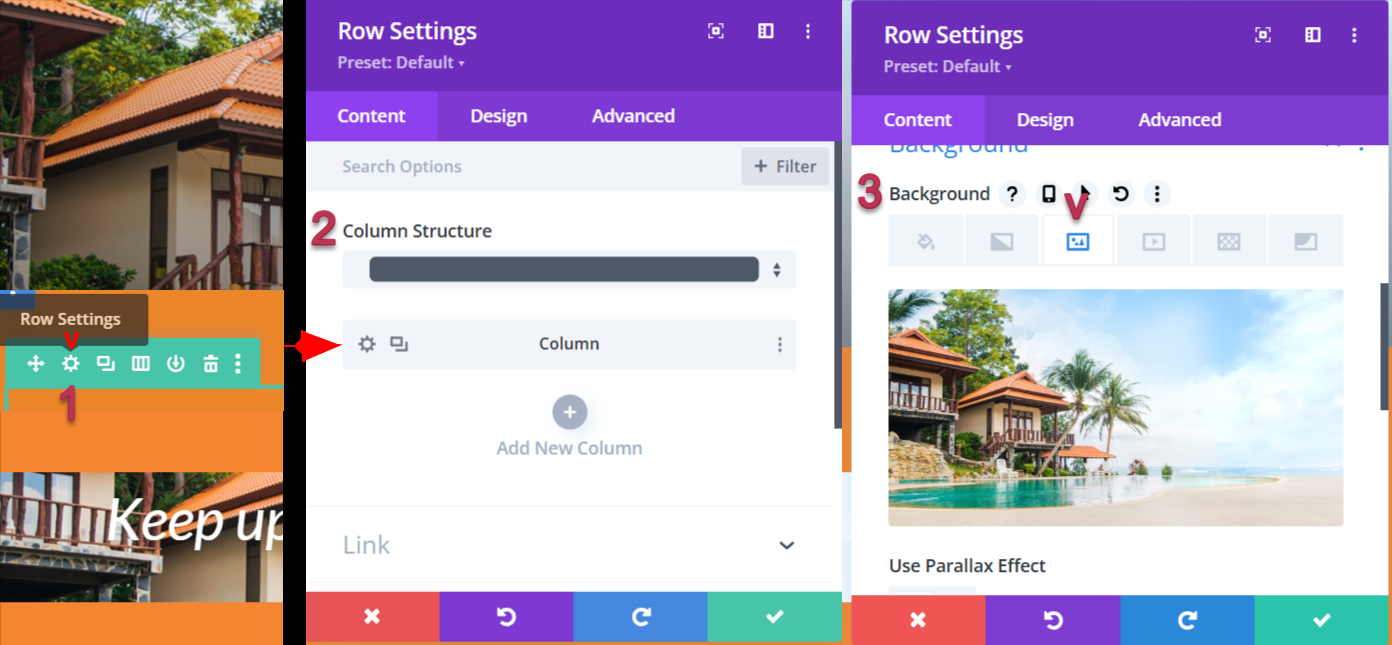
3. Scroll to Background → Picture tab, click the thumbnail image, and choose/replace your new image.
It is highly recommended you optimise your photos for web resolution so it doesn’t have a negative impact on your page loading speeds. WordPress will reduce super-large images to an extent but there are plugins available that will compress files to a minimum.
IMPORTANT: ALL STOCK PHOTOS ON THE DEMO SITE MUST BE REPLACED BY YOUR OWN PHOTOGRAPHY OR STOCK IMAGES YOU HAVE PURCHASED A LICENCE FOR.
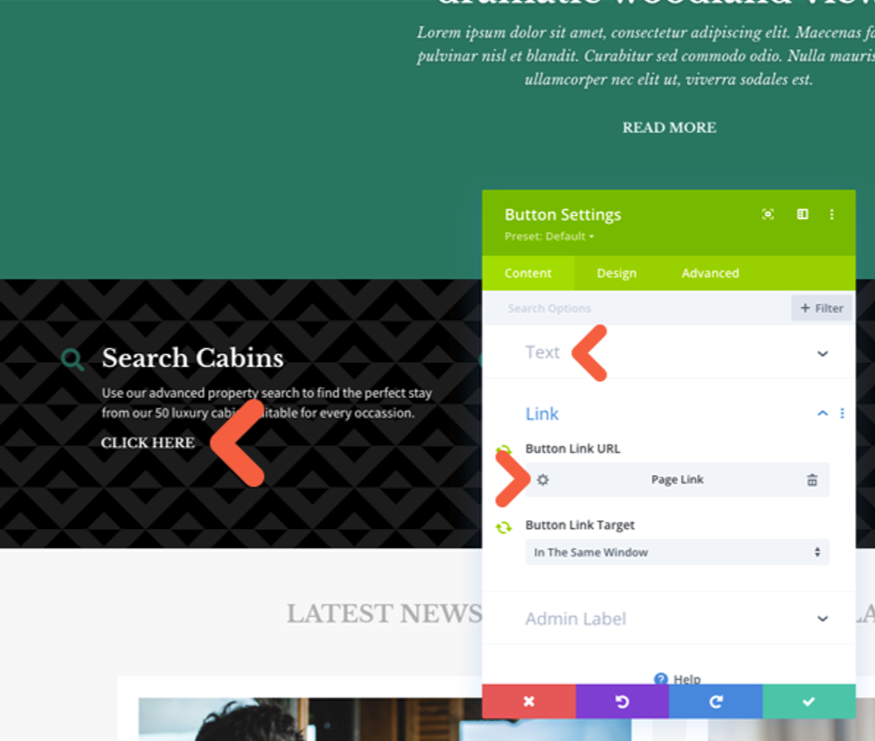
Button Module

1. Click the settings icon of the button you want to edit.
2. In the Call to action setting > Content section, Update the Button Text (if needed).
3. For Button Link URL, click the settings icon to open your website page list and select the target page.
4. Save changes and Update the page.
Slider Module
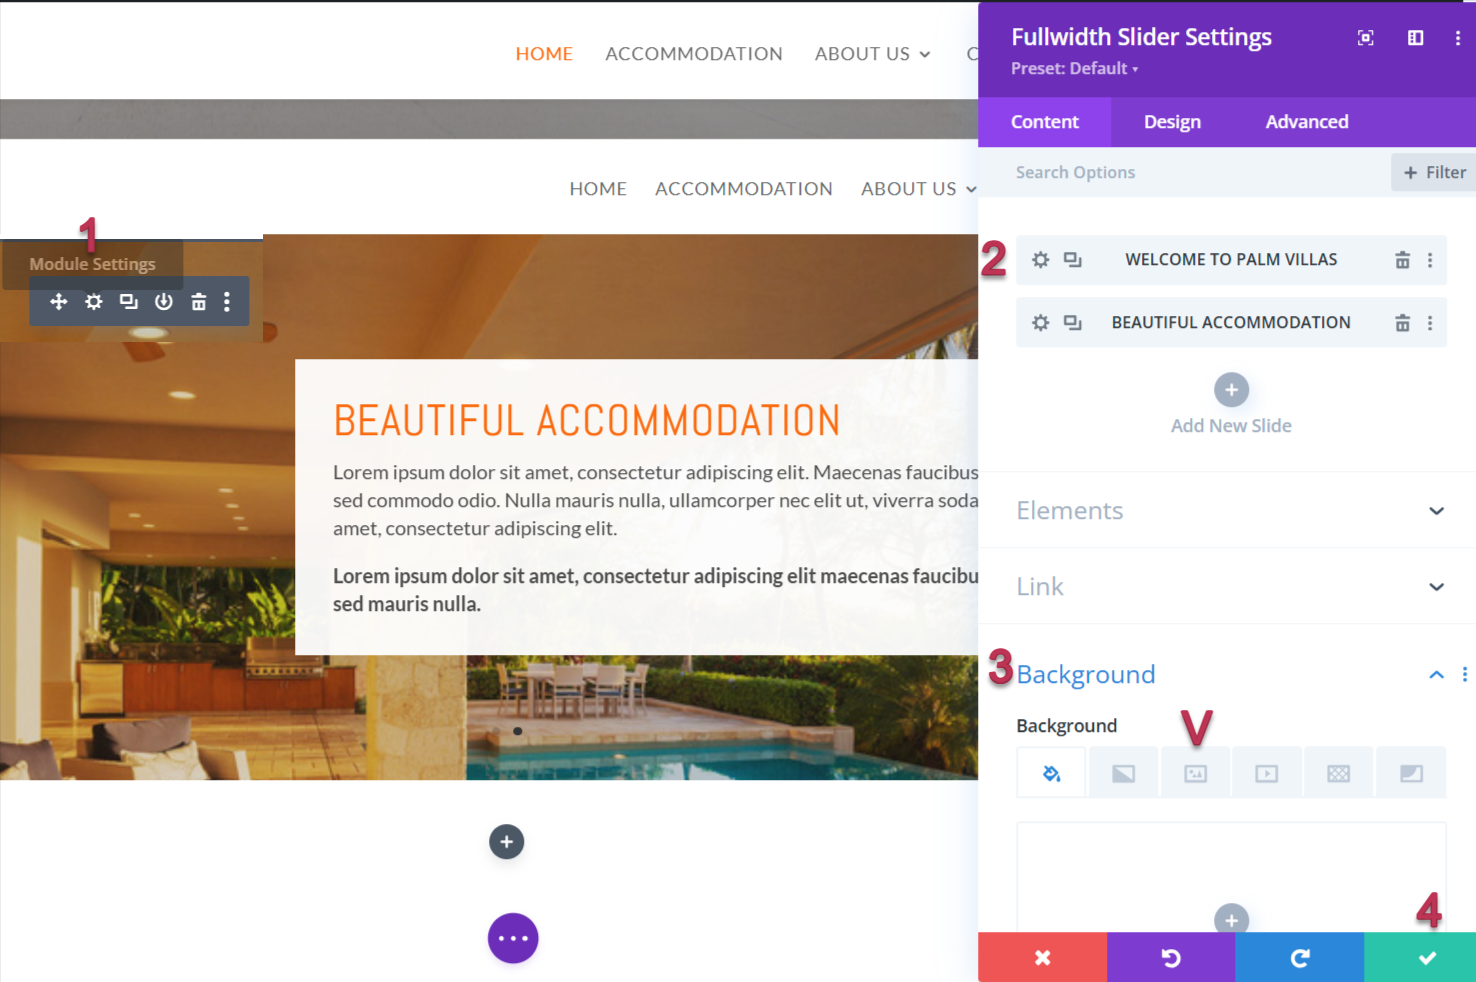
1. On the homepage, hover over the section showing multiple property messages and click the settings icon from the grey menu.
2. Update the Title, Button, and short descriptive text in the provided fields.
3. Scroll to the Background menu at the bottom, select tab 3, then click the default image.
4. Choose a new image from your media library and save changes.
Header Module
The works much like the slider module above but without the list of slides.
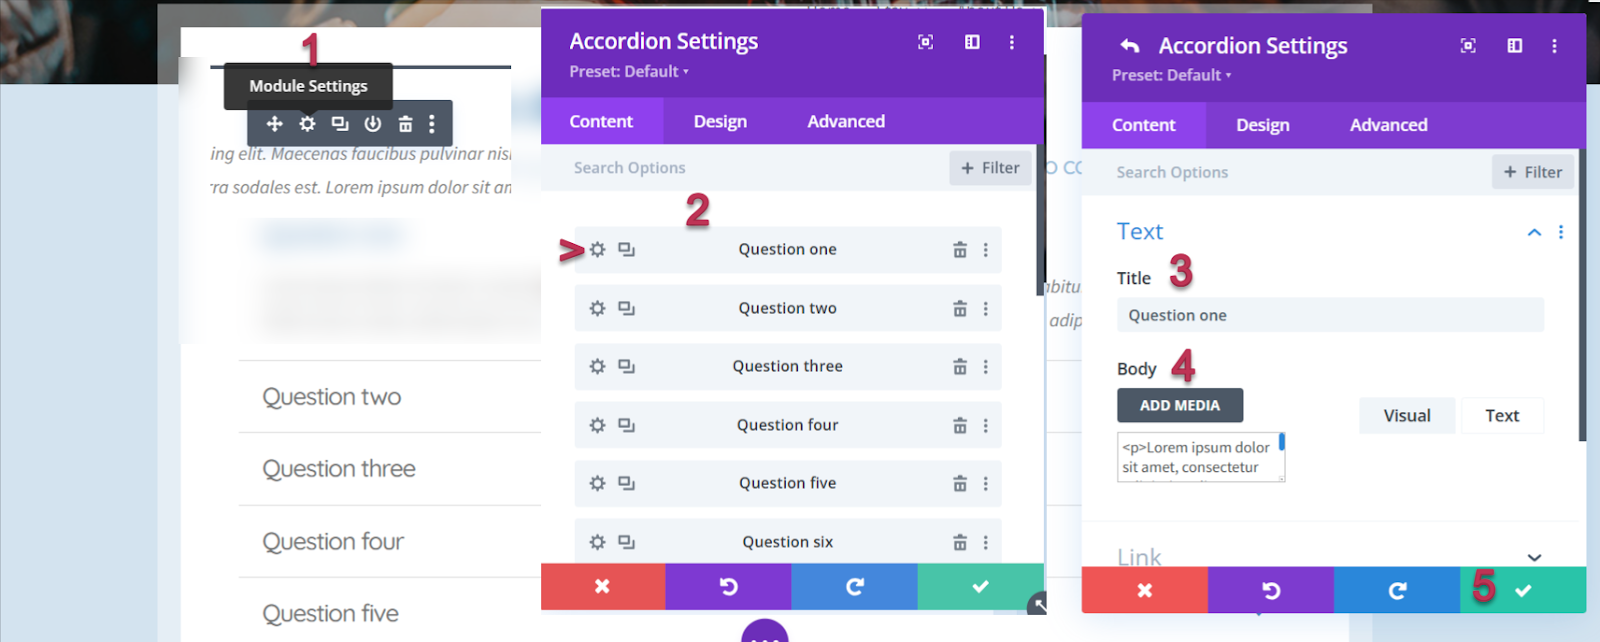
Accordion Module
Accordion and Toggle modules have very similar settings, the only difference is that accordions can display only one contents at one time – perfect for your FAQs page. Simply click the settings icon to reveal the questions list and you can add your answers in each text editor.
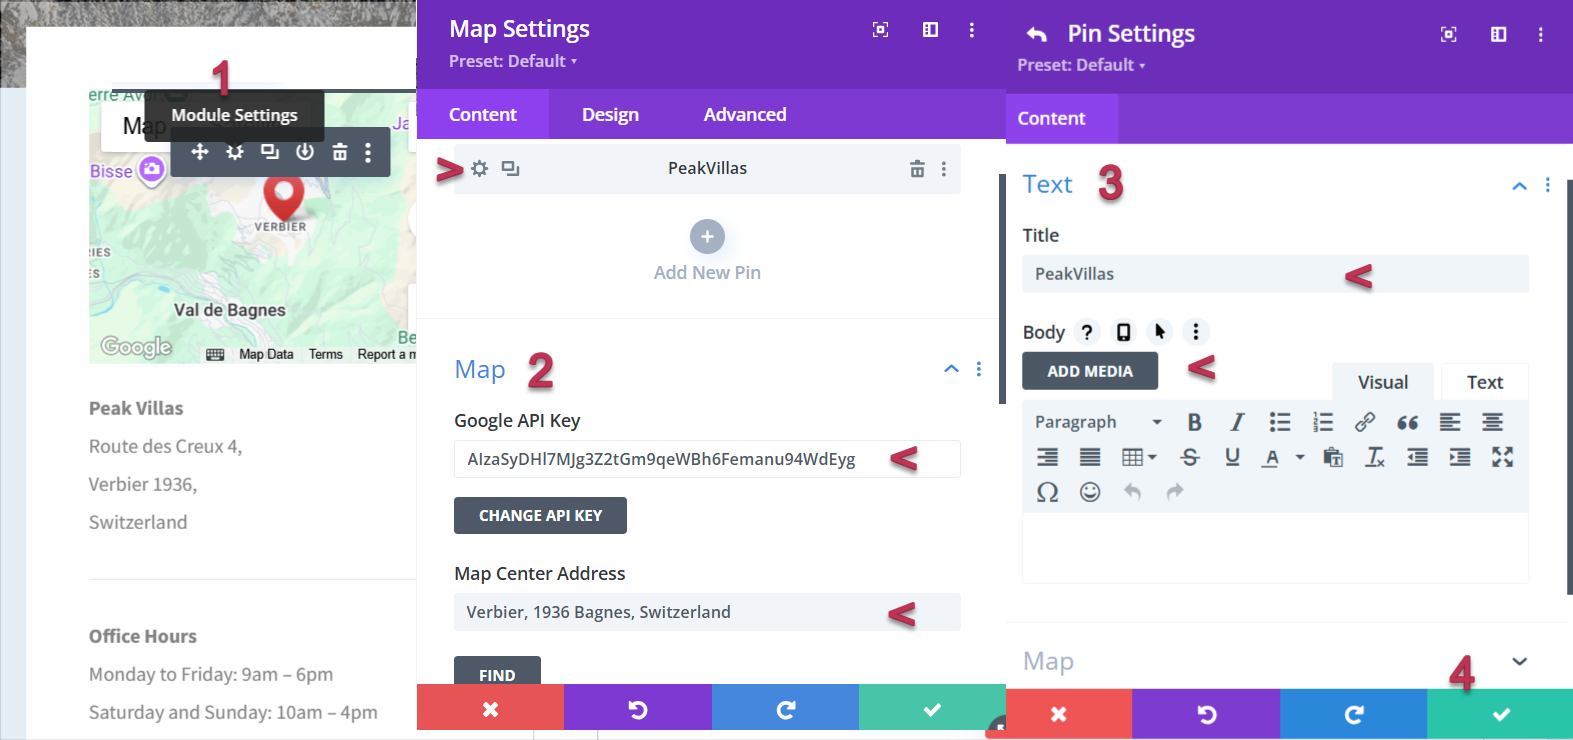
Map Module
An API key is required in order to use the Maps Module. This comes pre-installed with your theme but if you wish to obtain your own API key, log into the Google Developers Console, which will guide you through the process, and activate the Google Maps JavaScript API and any related services automatically. Click here for a detailed guide.
Click the settings icon for the map section.
Scroll to the Map menu and enter your API key. In Map Centre Address, type the city or town to be used as the map’s centre point, then click Find. Use the + and – icons in the preview to zoom in or out, or drag the map with your mouse for precise positioning.
Click the settings icon to add or edit to edit Title. Map Menu which you can insert an address for an accurate pinpoint location, click find button.
Save changes.
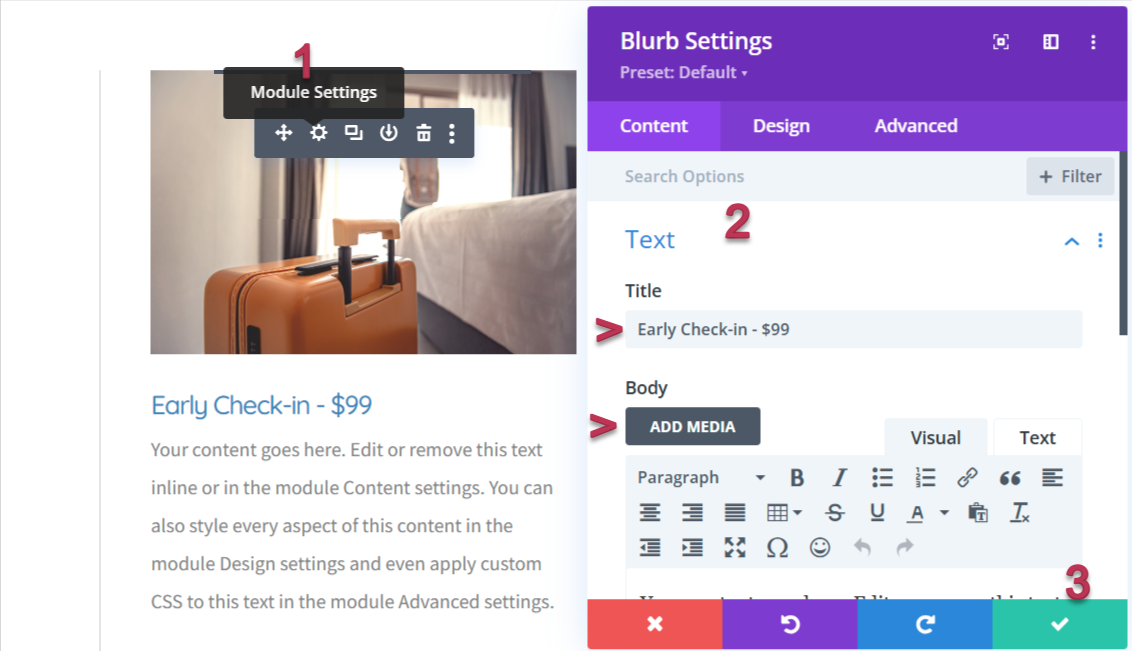
Blurb Module
Blurb module is a combination of image and text module – as used for services page. Click the settings icon to open the text field for Title & Price, Description (text editor) then scroll down to Image & Icon menu to change your image from the media library.
IMPORTANT: ALL STOCK PHOTOS ON THE DEMO SITE MUST BE REPLACED BY YOUR OWN PHOTOGRAPHY OR STOCK IMAGES YOU HAVE PURCHASED A LICENCE FOR.
All the styles for buttons were previously set up in the Theme Customiser so this is just a case of updating button text and link, if needed. These two tabs will be present as soon as you click the settings icon:
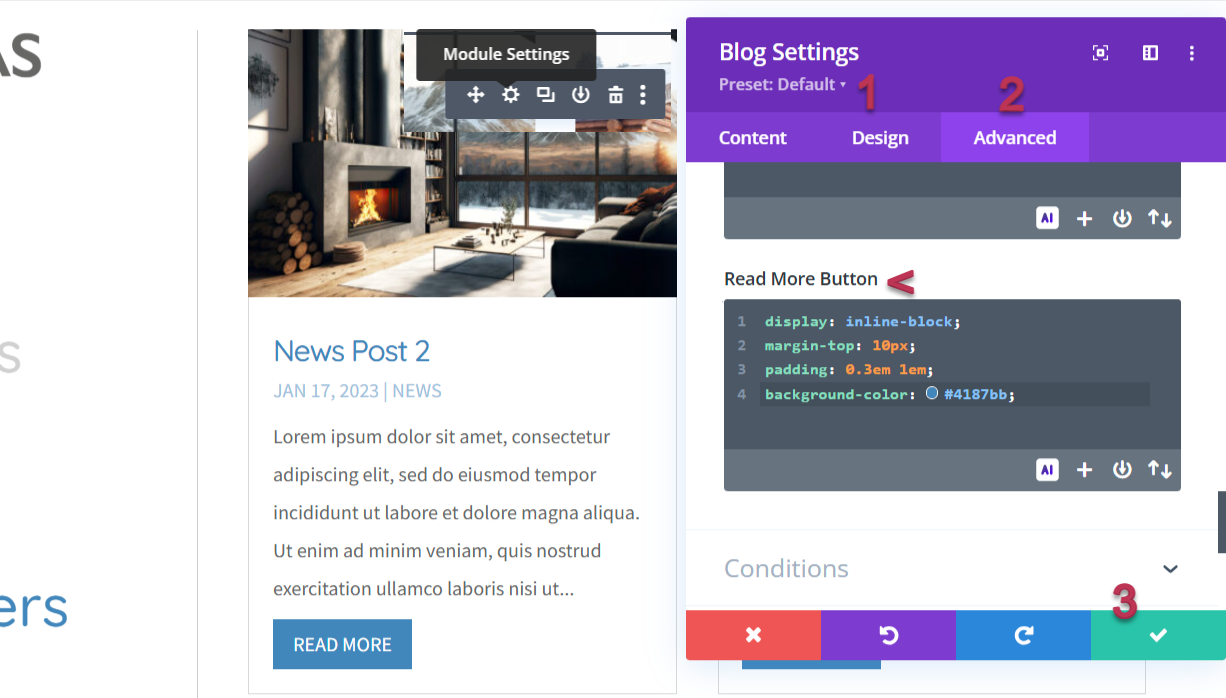
Blog Module
Blog module is used for the post grid on News Page. Most of the styling is connected using global styles but there is one area that requires extra attention – the ‘Read more’ text link.
1. Under the Design tab you can change the font-family under the Read more settings but to style the link like a button we need to use custom CSS.
2. In the module settings, visit Advanced tab > Custom CSS > Module Element > scroll Down and find Read More Button where you will see the default styles added. The code you may need to add/edit is the hex value of:
Background-color
Border-radius
Border (weight & colour)
3. Save change
Was this article helpful?
That’s Great!
Thank you for your feedback
Sorry! We couldn't be helpful
Thank you for your feedback
Feedback sent
We appreciate your effort and will try to fix the article