Your website includes three contact forms that will each need configuring if they are all required – contact form, job vacancy form and newsletter opt-in form. This article includes important points about configuring each form to ensure you receive email notifications each time a user clicks submit.
IMPORTANT: Email delivery and spam prevention are complex processes. We strongly recommend that you test delivery of your form before your site goes live and immediately afterwards. We also recommend that you regularly test it, to ensure that you are continuing to receive the emails.
Your website comes pre-installed with Gravity Forms. This is a powerful form builder that handles the processing and delivery of emails to notify you when someone submits a form. It also stores the forms, so you have a permanent record of all forms submitted.
Setting Up Forms
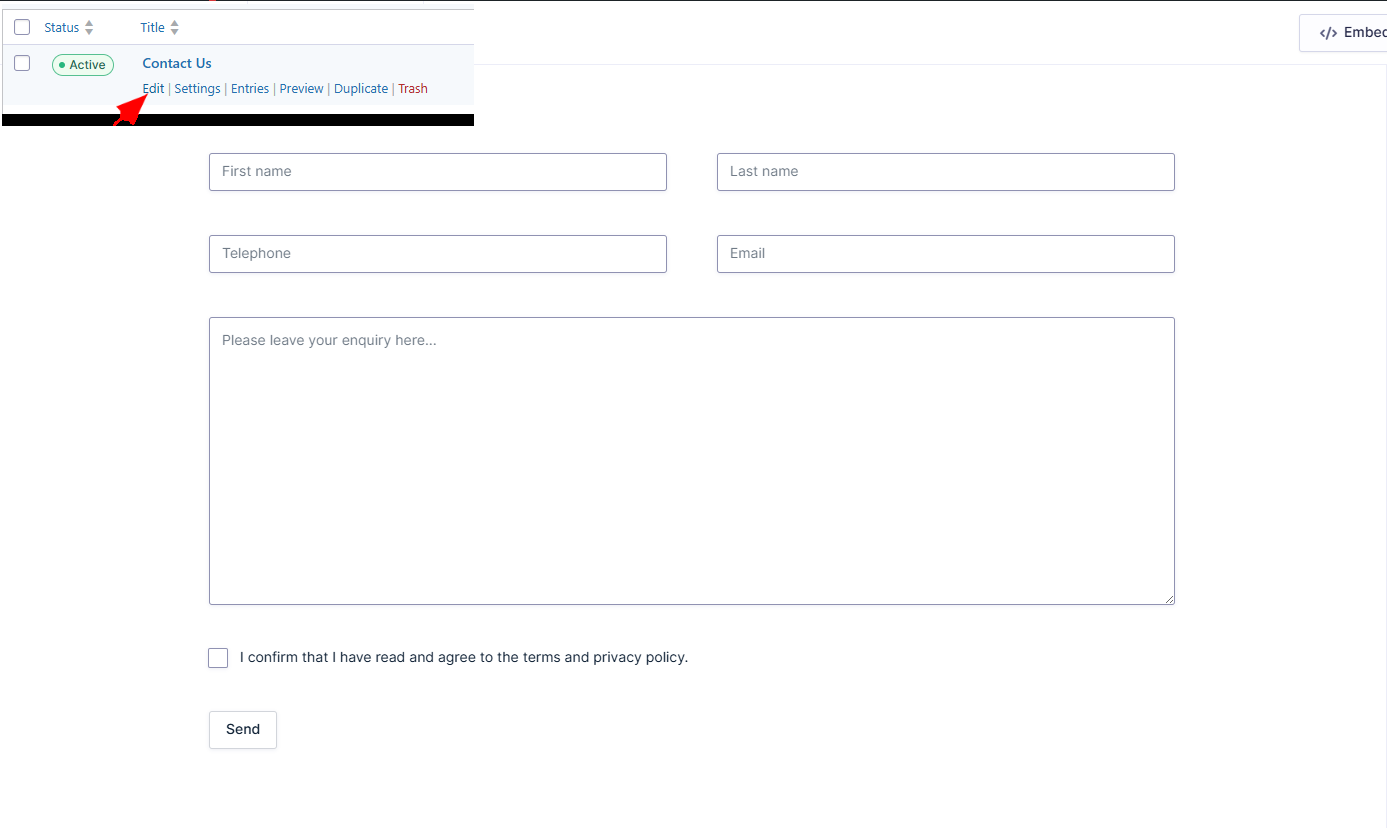
Navigate to Form Section > Hover over the ‘contact form’ settings for several options:

Edit Form
Navigate to Form Section > Hover over the form > Click “Edit”:
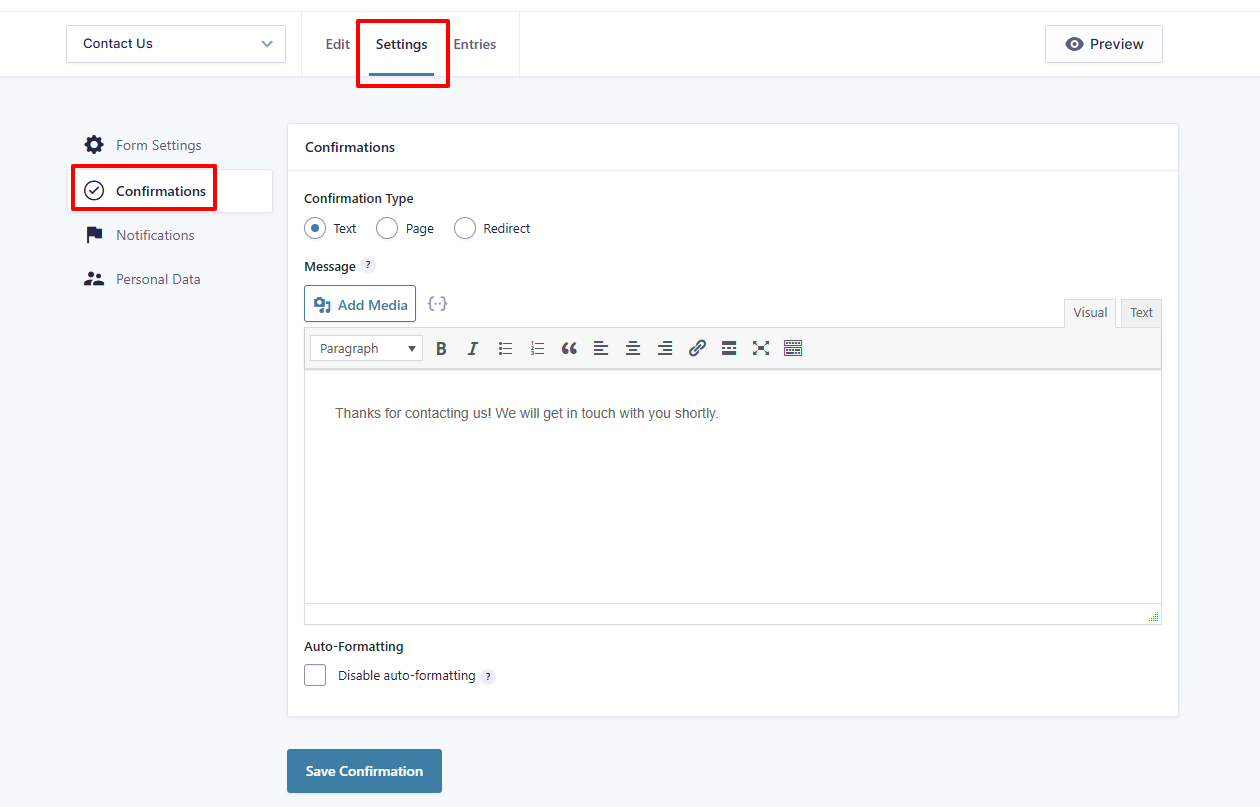
Confirmations
Here you can personalise the message that appears when the form has been successfully submitted by a user.
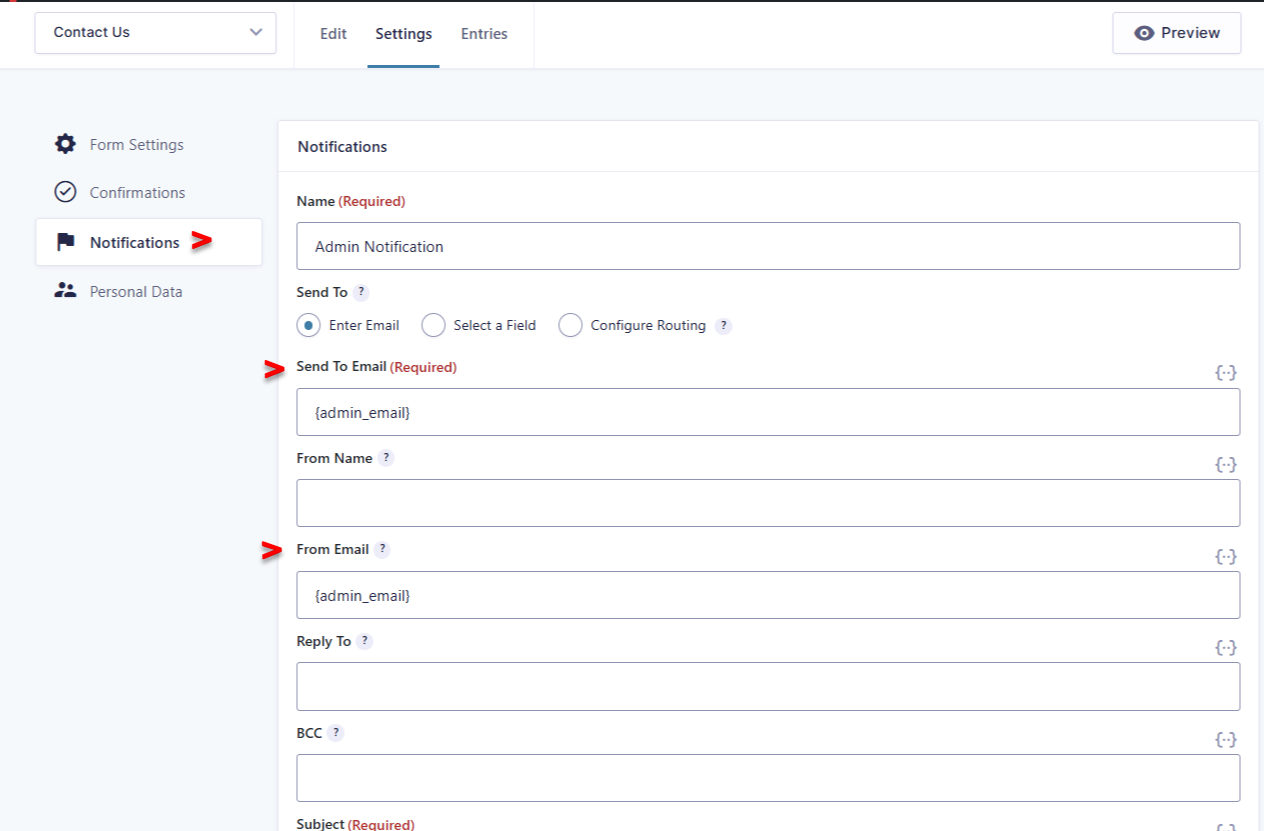
Notifications
Notifications are the emails that are sent to you, by the site, to let you know that a user has submitted the form. We call these Admin notifications.
By default the admin notification is set to send to and from: {admin_email} which is info@guestwisely.io. Emails sent to this email address, from your website, will automatically be routed to the mailbox within your GuestWisely account. So they will be visible for you to manage from there.
We’d recommend leaving the settings as above. However, if you want emails to also be sent to another email address, we suggest adding that in the BCC field.
You can also edit the default notification email that you receive if required. Click ‘update notification’ if you do make any changes.
Adding forms to chosen pages
By default Laguna comes with three forms. You can add these to multiple pages, if required. Or you can create new forms and then embed them within the pages on your website. To add a form to any page on your website, this is the process.
Make a note of the form ID from the list of forms
Navigate to pages and then select the page where you want to add a form.
From the page you’re editing select the ‘Edit with the Divi Builder’.
Select the area where you’d like to insert the form and add a new code module.
Insert the following snippet of code into the code settings box: [gravityform id=”X” title=”false” description=”false” ajax=”true”]
Replace X with the ID of the form you want to include.
Storing Form Submissions
Gravity forms automatically store all entries made using your contact form. Click ‘forms’ from the side menu of your content management system, hover over the contact form and this time select ‘Entries’. You will then be presented with a list of all entries made using that form.
Testing Your Forms
As with any form, we strongly recommend that you test, test and then test again the delivery of your form email notifications. To check that you are receiving them ok. Email delivery and spam prevention are complex processes and emails can end up in your spam filters or be rejected by your email server. If you are having problems with email deliverability, please let us know and we will see what additional measures can be put in place to help.
Was this article helpful?
That’s Great!
Thank you for your feedback
Sorry! We couldn't be helpful
Thank you for your feedback
Feedback sent
We appreciate your effort and will try to fix the article