Introduction
This tutorial guides you through setting up conversion tracking for your GuestWisely website, so you can accurately measure bookings, inquiries, and contact form submissions.
How the Integration Works
GuestWisely automatically injects the required tracking scripts into your WordPress website.
After you configure your tracking IDs and set up the redirect pages for conversion tracking, the system will automatically link all tracking data and capture key events across the user journey.
Please follow the steps below:
Step 1: Locate Your Tracking ID
Before connecting the integration, you will need the Google Analytics 4 Measurement ID. Format example: G-XXXXXXXXXX
You can locate this inside your GA4 Property settings. Google Official Guide available here for your reference.
Note: Support for Meta Pixel and Google Ads conversion tracking is planned to be added in future updates. Once available, these integrations will allow additional tracking capabilities across advertising platforms.
We will update this documentation as soon as these features are available.
Step 2: Connect Your Tracking IDs to GuestWisely
Navigate to Website CMS Dashboard > GuestWisely Plugin Settings
Then enter the Google Analytics 4 Measurement ID
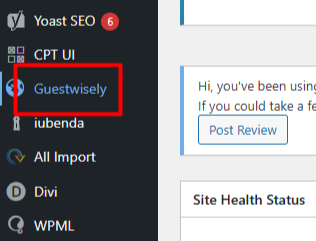

Step 3: Configure Conversion Tracking Pages
You need to create redirect pages for each conversion type.
Booking Confirm
Create a new page to serve as your Booking Confirmation Redirect page.
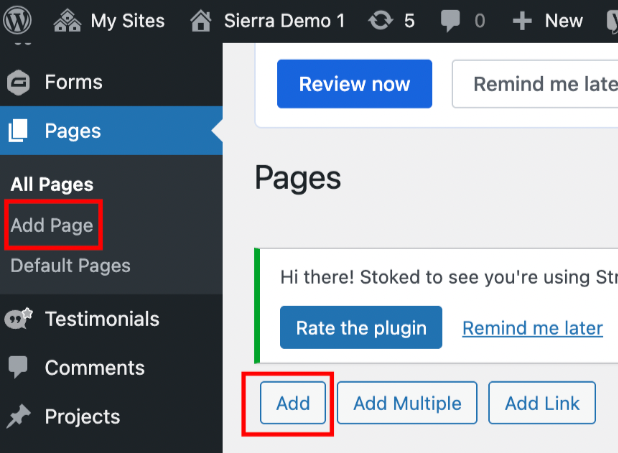
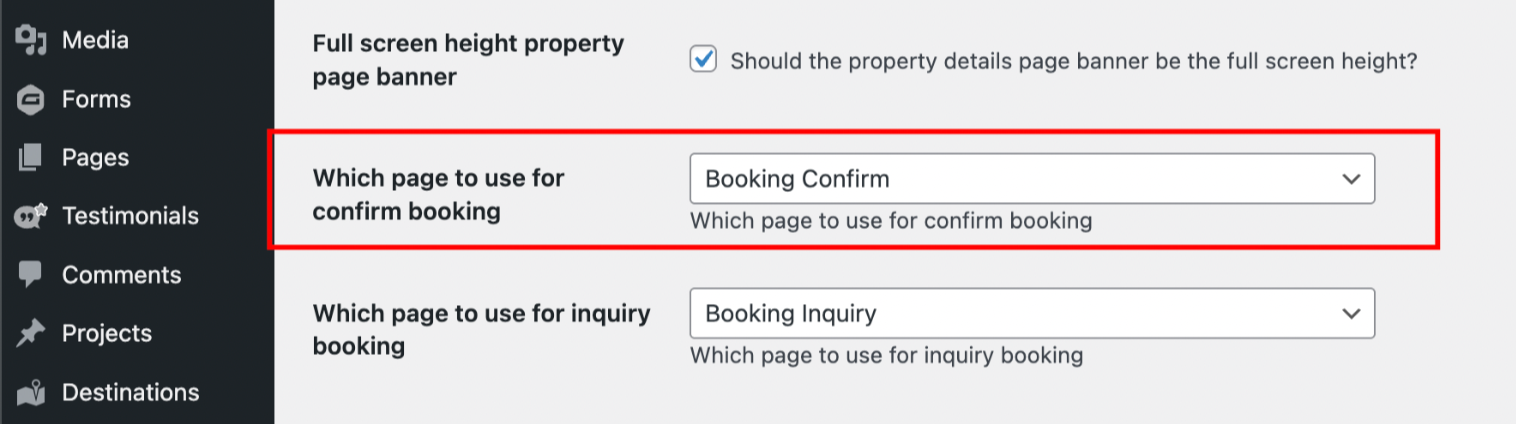
Assign it in GuestWisely Plugin settings:
Locate the "Which page to use for confirm booking" setting.
Select the Booking Confirmation Page you created in the previous step.
Save your changes.
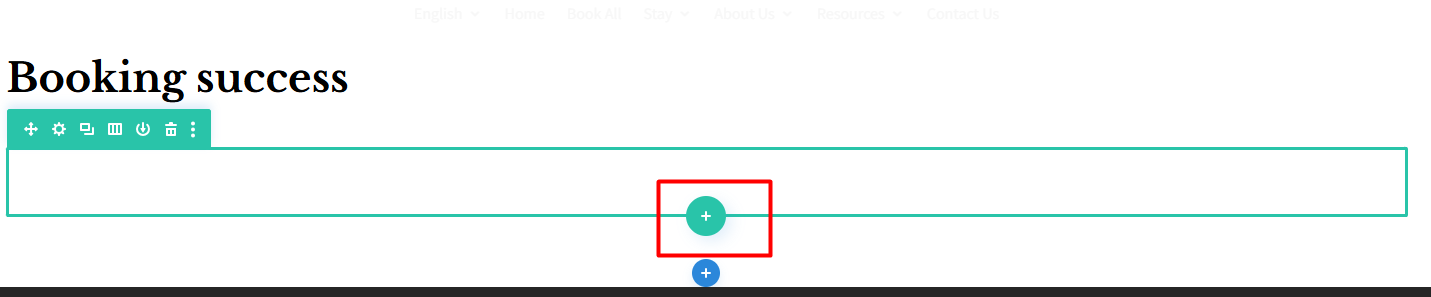
Add shortcode to Booking Confirmation page:
Open the page using Divi Builder
Insert Row > Insert Module > Code Module
Add this shortcode: [guestwisely-tracking-success]
Save and publish the page.
![Add shortcode to Booking Confirmation page: Open the page using Divi Builder Insert Row > Insert Module > Code Module Add this shortcode: [guestwisely-tracking-success] Save and publish the page.](https://s3-eu-central-1.amazonaws.com/euc-cdn.freshdesk.com/data/helpdesk/attachments/production/201116614038/original/iaE4HNtIKB7diKAWwiQ_B1SlNdN71f3aCw.png?1790338081)
Booking Inquiry
Create a new page to serve as your Booking Inquiry Redirect page.
Assign it in GuestWisely Plugin settings:
Locate the "Which page to use for inquiry booking" setting.
Select the Booking Inquiry Page you created in the previous step.
Save your changes
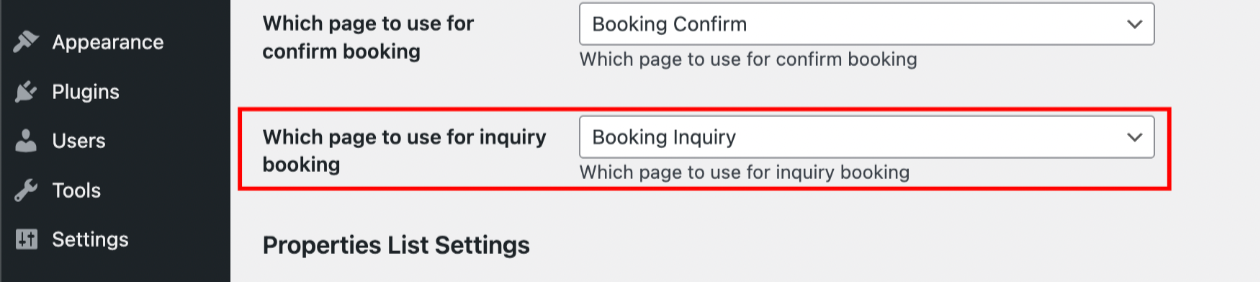
Add shortcode to Booking Inquiry page:
Open the page using Divi Builder
Insert Row > Insert Module > Code Module
Add this shortcode: [guestwisely-tracking-inquiry]
Save and publish the page.
![Add shortcode to Booking Inquiry page: Open the page using Divi Builder Insert Row > Insert Module > Code Module Add this shortcode: [guestwisely-tracking-inquiry] Save and publish the page.](https://s3-eu-central-1.amazonaws.com/euc-cdn.freshdesk.com/data/helpdesk/attachments/production/201116614036/original/VIhORCREJwofJapE9Oqyxqi9-b5fcd6qLQ.png?1790338080)
Contact forms
Create a new page to serve as your Contact Us Redirect page (if it has not been created yet).
Assign it in GuestWisely Plugin settings:
Locate the setting: “Which page to use for the contact page”.
Select the Contact Us Redirect Page you created in the previous step.
Click Save Changes to apply your settings.
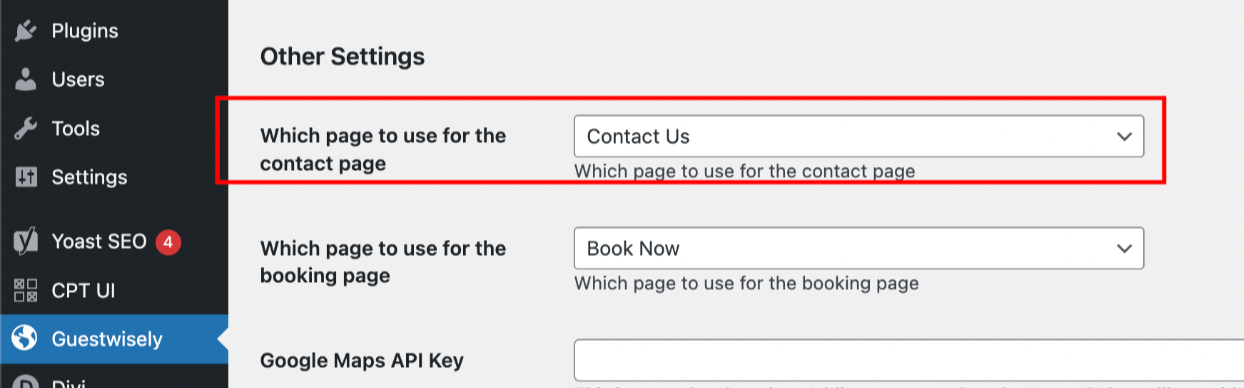
Add shortcode to Contact Us Redirect page:
Open the page using Divi Builder
Insert Row > Insert Module > Code Module
Add this shortcode: [guestwisely-tracking-contact]
Save and publish the page.
![Add shortcode to Contact Us Redirect page: Open the page using Divi Builder Insert Row > Insert Module > Code Module Add this shortcode: [guestwisely-tracking-contact] Save and publish the page.](https://s3-eu-central-1.amazonaws.com/euc-cdn.freshdesk.com/data/helpdesk/attachments/production/201116614037/original/keEJQmnIV4DeCQf8NV6nL7_Cb7erJIVjDg.png?1790338080)
Step 4: Review Automatic Conversion Tracking
After a guest successfully completes a booking, submits a booking inquiry, or fills out a contact form, they will be redirected to the Booking Confirmation (Thank You) page, Booking Inquiry page, or Contact Form Confirmation page.
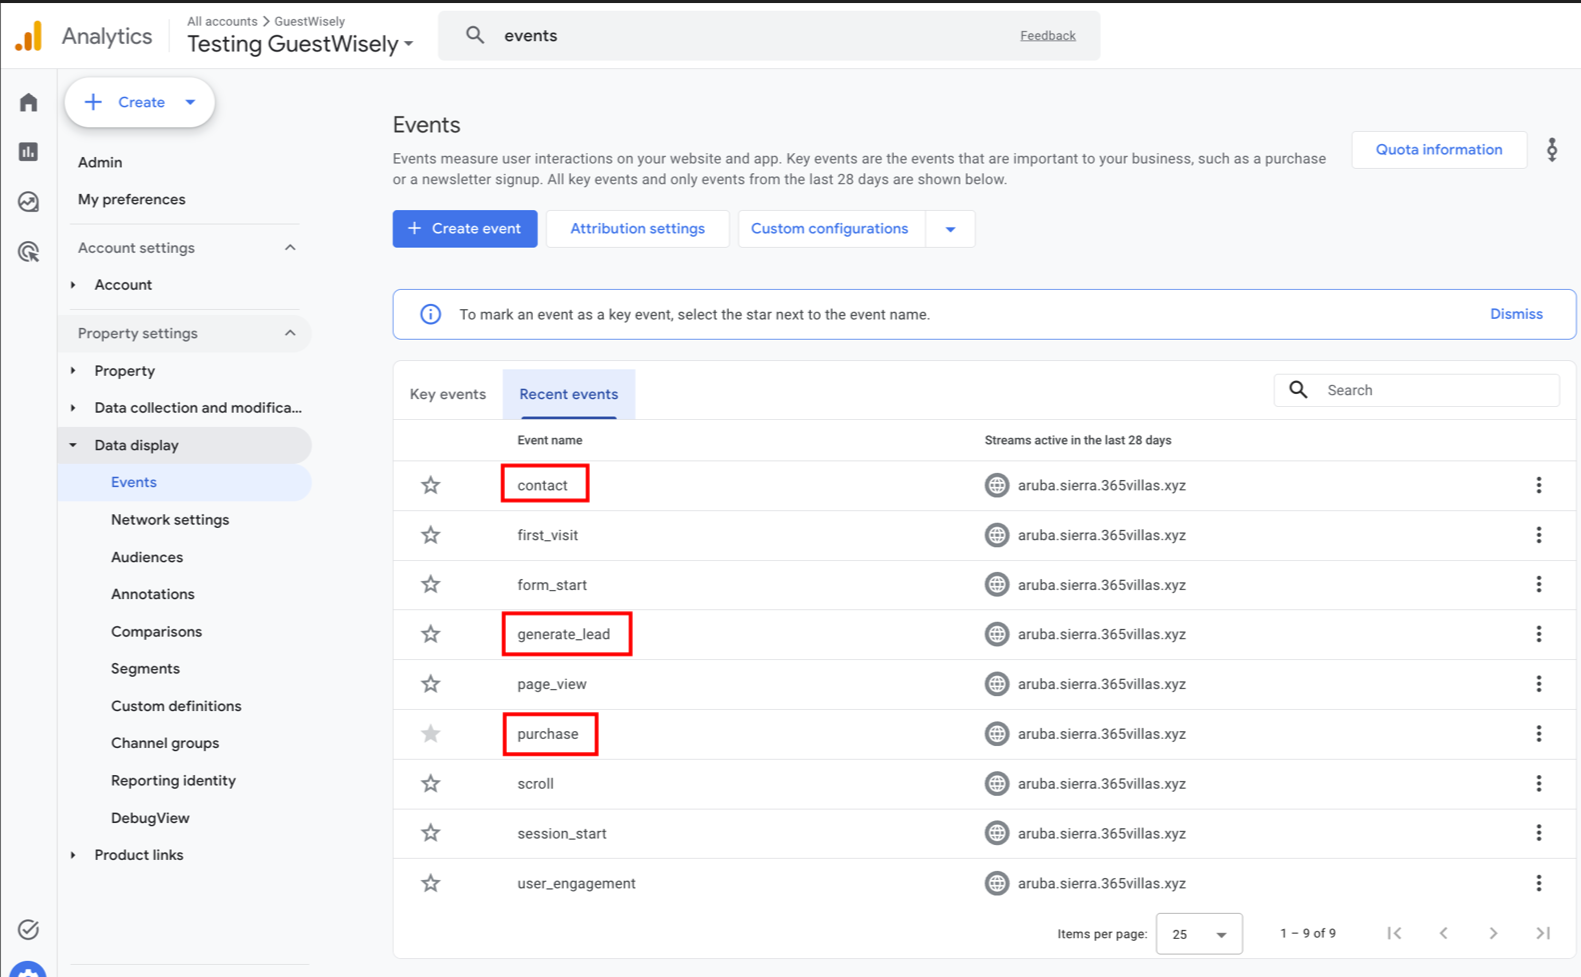
From these pages, Google Analytics will automatically track the following events:
Direct bookings → Purchase event
Booking inquiries → Lead (generate_lead) event
Contact form submissions → Contact event
Need Help?
GuestWisely also offers paid consultation services for users who need custom or advanced tracking setups.
Please contact our Support Team at support@guestwisely.io for more information.
Was this article helpful?
That’s Great!
Thank you for your feedback
Sorry! We couldn't be helpful
Thank you for your feedback
Feedback sent
We appreciate your effort and will try to fix the article